Showing posts with label Cookies. Show all posts

Tuesday, May 8, 2012

Make It Monday! M&M Cookies!

Ok so I'm late with Make it Monday again... I've started to workout on Monday nights lately and I have been forgetting to post in the morning to avoid forgetting completely. However in my defence, I have to go to the gym more as all I have been making for Make it Monday has been COOKIES!!!


Now I love a good cookie, but I love, love, love M&M's... so why not put them together right... well there is that but also I get sucked into all the after holiday sales and I buy the ridiculously cheap bags of candy and chocolate... so this recipe uses up both Easter M&M's as well as a small solid Easter bunny.


I always buy that cheap chocolate and think this will be great for baking (because that was what my mom always said) but I tend to just chop it up and use it in chocolate chunk cookies. Oh well... at least they taste good!
M&M Cookies!


1 cup brown sugar
1/2 cup of margarine (softened)
1 egg
1 tbsp vanilla
1 3/4 cups flour 
1 tsp baking powder
1 cup M&M's
Small Easter bunny chopped into chunks or 1 1/2 cups chocolate chips

Cream butter and sugar, add egg and vanilla and mix well. Add flour, baking powder and a pinch of salt, once combined add M&M's and chocolate. Bake on a prepared baking sheet at 350 for 8 minutes. 

These are a cakeyer cookie then I usually like but they are super yummy!

I also tried out this tip from the Fooducate blog!


Have you seen this tip floating around pinterest? Putting cookie dough into an ice cube tray and freezing it for later use! SO HELPFUL! I can now have a half dozen of these cookies or even just one or two of them for the kiddos lunch at anytime! 


How do you use up candy and chocolate from the holidays? Do you buy extra like me and what do you do with your extras? Let me know so I can use mine up... Haha

Monday, April 23, 2012

Make It Monday! S'mores Squares!

I love Summer and all things outside in Summer... but I especially love a camp fire and s'mores!

I love them so much.. I made these cookies last year and while I loved them they just weren't the s'mores flavor or texture I was looking for so I made these...


Now I'm sure that you can find something similar if you google search but I was in a baking/cooking mood when inspiration hit me and I just kept going...

This recipe is super simple and follows a similar recipe that you have no doubt used before when making rice crispy cookies!


S'mores Squares!
1 Tbsp Butter
2 1/2 Cups Marshmallows
2 Cups Golden Grams Cereal (I use the Sally brand from Walmart...)
About 1/2 to 1 Cup Chocolate Chunks (or 1/2 of a Chocolate Easter Bunny... not that I sacrificed one of Delaney's bunnies for this recipe.)

Melt the marshmallows with the butter over medium heat, then remove from heat and add in the cereal and then the chocolate, mix well and press into a small square dish that is greased. Allow to cool and cut into squares!

These are crispy and chewy and are full of chocolate all in one bite and they got the stamp of approval from Robyn's work buddies so they must be good!

If you like S'mores give these a try they are sure to bring you back to last years camp fire with family and friends... or at the very least get you ready for the real thing in the next few months!

 
PS linking up with It's Just Called Spicy and Rock and Share at the Shady Porch! Stop by and check them out!

Tuesday, January 24, 2012

Make it Monday! Marshmallow Snowballs!

(So it's Tuesday.. I know... but in my defense I started this post yesterday but between making valentines working on "school work" and feeding my offspring I got a little distracted but on the upside TWO posts today! YAY!!! I'm trying to get my act together and if posting a day late helps well its what I gotta do!)


These snowballs are not your average snowballs... and they are certainly not those yucky pink marshmallow ones either!

In this corner of Canada snowballs or at least the edible ones are made of chocolate and coconut and then rolled in more coconut... Not so nice if you don't like coconut but if you do... YUM!

These snowballs are from a recipe from my grandmother.... they are Christmas to me.... I love them soooo much that she once made me a batch (an entire batch just for me) for my Christmas gift! I love them sooo much that I finally asked for the recipe and I make them every year... except this year. I ran out of time and never got to make them.... but I so wish I had. 

So since I had the ingredients just sitting in the cupboards I thought that I would whip up a batch and I was so glad that I did....

NOTE: I have no pictures for this post... that may or may not be because I have eaten them all...

This is a super easy recipe and has just 6 ingredients....

2 tbsp butter (maybe a little more)
1 block of bakers chocolate (or more... I use chocolate chips and I use a cup or so, this will require more butter)
1 can sweetened condensed milk
1/2c coconut (plus enough to roll the snowballs in)
2c graham crumbs
large marshmallows (cut in half)


Melt chocolate and butter in a double boiler then combine with other ingredients and wrap a small portion (about a teaspoon) around the 1/2 marshmallow then roll in coconut.

Do you have a family recipe that you just can't pass up? I'd love to hear about it in the comments!

Monday, October 17, 2011

Make it Monday! Butterscotch squares!

A few weeks ago while visiting Robyn's parents his mom went to the supermarket to find that they had Chip-its on sale for $1 a bag!!!! 
So like you would she stocked up! and picked up a bag or two for me too...

One of the bags she got for me was a bag of butterscotch Chip-its. I had never used them before and had no idea what I was going to make them into until she pointed out the recipe on the back... 

Tiger Bars.... 
They are super easy to make, and super yummy too but since making them the first time I have omitted the butterscotch drizzle because well I did it the fast and easy and wrong way the first time and I'm too lazy to try it the long and right way.... but here is the whole recipe you decide if you wanna do the drizzle....

1/4 c butter or margarine
1/4 c corn syrup
1/4 c packed brown sugar
1/2 c butterscotch chips
2 c crisp rice cereal
1 c semi sweet or milk chocolate chips
1/4 c butterscotch chips
1 tsp oil

Bring to a boil the sugar, butter and corn syrup. Then remove from heat and stir in butterscotch chips until melted and smooth, add rice cereal and press into a greased 8x8 dish or pan. Melt chocolate chips and spread over butterscotch mix. 
Melt the remaining butterscotch chips with oil in a double boiler, drizzle over bars. refrigerate until chilled enough to cut into bars.

That last part sounds easy hey melt in a double boiler and drizzle over bars... it would be if it didn't take three dishes to do... so me trying to take the easy way tried to do it in the microwave and well it didn't work... so I just crumbled it over the top of the bars. Honestly though I don't think it needs the drizzle, they are rich and sweet and crispy and yummy just the way they are...

Do you ever try out the recipes that come on the packages of the items you buy?? Or are you like me, try them and then make them the way you like??

Happy Monday! Treat yourself!

Wednesday, September 14, 2011

Baking FAIL! Flourless Chocolate cookies!

I love to bake... I love to eat baked goods... I love to try new recipes for baked goods.
However sometimes these new recipes can go horribly horribly wrong... 

I figured that since I try so many recipes and of course there are going to be a few that wont work out eventually I should share with you the epic baking fails that I have as well as the great successes. 

My sister asked me to make these cookies for her as she loves Flour-less Chocolate Cake... and I had already pinned them on Pintrest so I thought hey why not.... 
Here is the recipe....

Flour-less Chewy Chocolate-Walnut Cookies

2 3/4 cups walnut halves
3 cups confectioners’ sugar
1/2 cup plus 3 tablespoons unsweetened cocoa powder
1/4 teaspoon salt
4 large egg whites, at room temperature
1 tablespoon pure vanilla extract

Preheat oven to 350.

Spread the walnut halves on a large-rimmed baking sheet and toast in the oven for about 9 minutes, until they are golden and fragrant.  Allow them to cool, then chop them coarsely.

Position two racks in the upper and lower thirds of the oven and lower temperature to 320.


Line two large-rimmed baking sheets with parchment paper.


In a large bowl, whisk (or combine in an electric mixer on low speed) the confectioners’ sugar with the cocoa powder and salt followed by the chopped walnuts. While whisking (or once you change the speed to medium), add the egg whites and vanilla extract and beat just until the batter is moistened (do not overbeat or it will stiffen).


Spoon the batter onto the baking sheets in 12 evenly spaced mounds, and bake for 14 to 16 minutes, until the tops are glossy and lightly cracked; shift the pans from front to back and top to bottom halfway through to ensure even baking. Slide the parchment paper (with the cookies) onto 2 wire racks. Let cookies cool completely, and store in an airtight container for up to 3 days.


So on Sunday I got it all ready and made these cookies... 
and as you may have guessed they were a huge fail! they never baked the way they should and they stuck to the pans like crazy, when I say stuck I mean the only part that came off was the edges and they came off in small slivers. They tasted great, at least the edges did... and I'm sure the only reason they didn't work was because I messed the recipe somehow. However I got so mad that the works of it went in the trash shortly after... 
no pictures, no evidence, nothing left! 

I get really mad when something I make doesn't work out... (like throw things across the room mad) and it likely gets thrown out, taken apart or just left as is and is never touched again... 

Oh well it's bound to happen!

How do you react when things go wrong? Do you lose it like me or do you keep your cool and find a way to make it work? I'd love to hear some coping strategies if you have them... Leave me a comment and maybe next time I have a fail I can try them out....

Monday, September 12, 2011

Make it Monday! S'mores Cookies!

Are you missing summer? 
I'm not... not yet anyway (I'm a fan of the fall!)
But one thing that I did miss from this summer is one of the greatest things about summer.... I love a good camp fire. 
Needless to say between trips to the hospital, babies and bed rest I didn't make it to any this year. So I have been longing for some S'mores!
I have been trying to find a way to make a S'mores chocolate chip cookie for a week or so (by trying I mean I've been thinking about it) and then I thought...
"Hey I bet that someone else has thought of this too!"
And of course they have!

My Google search returned 552,000 results for S'mores cookies! (can you say YUM) SO I had a look around and chose this one! 

I found it on Make and Bake but they got it from Cookie Madness

S'mores Cookies
recipe from Cookie Madness

3/4 cup softened butter (1 1/2 sticks)
1/2 cup sugar
1/2 cup brown sugar, packed
1 egg
1 tsp vanilla extract
1 1/4 cups flour
1 cup graham cracker crumbs
1/2 tsp salt
1/2 tsp baking soda
1/2 cups semi-sweet chocolate chips (I used mini chips)
1 cup mini marshmallows (I used slightly more than a cup)
2 Hershey bars, chopped up

Preheat oven to 375ºF.

In a stand mixer, combine the butter and sugars until fluffy. Mix in egg and vanilla until combined. Add the flour, graham crackers, salt, and baking soda, and mix well. Stir in the chocolate chips.

Drop by rounded tablespoon onto cookie sheets (I didn't use parchment, and one tray of cookies stuck a bit to the sheet, but the other was fine, so you may want to use parchment just in case). Bake for 8 minutes, and remove from the oven. Push 3 to 4 marshmallows and a few pieces of Hershey bar into each cookies. Return to the oven and bake an additional 3-4 minutes until fully cooked. Cool cookies on a wire rack.

Makes 3 dozen cookies.

The pictures at Make and Bake are much better!

I didn't have any Hershey bars so I just made the recipe omitting them, and I used regular large sized marshmallows and cut them into quarters because I didn't have any small ones.  Boy oh boy were these yummy! I'd defiantly make them again and again and again and I just might have to as 1/2 of them are gone already!


Have you turned a family favorite bar or desert into a cookie? or do you just favor the original?

Thursday, July 14, 2011

Tell the Truth Thursday! Ive Been Cheating....

I'm such a fan of home baked goodies...
I love fresh baked cookies... but lately I have been cheating....
I bought a tub of factory made cookie dough as part of a fundraiser that my mom's friend was running for her new Christmas charity (more on that next week) and because its easy and quick and they taste good Ive been relying on that for fresh homemade cookies.... Plus how does one go wrong with cookie dough for $10 that makes like 8-10 dozen cookies!
I haven't mixed a cookie dough in about a month and it feels great...
And now that I am supposed to be "resting" until the baby comes it's been even easier to bake fresh cookies warm and gooey from the oven while still being good and resting like I'm supposed to.

Delaney hasn't noticed and she loves them!
So... 
I ordered 2 more tubs....
Looks like I will be cheating for a while!

Monday, June 20, 2011

Make it Monday! Quadruple Chocolate Chip Cookies.....

Your drooling right... 
Just the title alone make you drool right... 
Well that's what I thought when I saw this recipe over at Simply Baking!

I found her on a blog linky party back in May and I am so glad I found this recipe!

These cookies have a definate personality disorder... they really aren't sure if they are brownies or cookies but either way they are awesome! 

 They don't look like much (maybe because these were the last two left) but let me tell you Y-U-M!

And since I love them soooooo much I wanted to share (cause I'm nice like that)! 

Quadruple Chocolate Cookies/Brownies
Ingredients
1c (2 sticks) unsalted butter, room temperature
2c all purpose flour
2/3c unsweetened cocoa powder ( I prefer Nestle)
1tsp baking soda
1/2tsp baking powder
1tsp salt
1 pound semi-sweet chocolate chips
2c firmly packed brown sugar
4 large eggs, room temperature
2tsp pure vanilla extract
1 1/3 cups white chocolate morsels
2/3c milk chocolate (or semi - sweet) morsels

Directions
1. Pre heat oven to 350 degrees

2.  Melt 1 pound of semi sweet chocolate chips in a double-boiler or in the microwave for 30 second intervals, stiring in between each 30 seconds.  Set aside once chocolate is smooth.

3.  Combine flour, baking soda, baking powder, cocoa, and salt in a medium bowl.

4.  In a stand mixer, or using a hand mixer, cream together the butter and brown sugar.  Add eggs, one at a time, mixing well after each egg addition.   Add the vanilla, then add the cooled chocolate to the mixture and blend well.

5.  Add half the flour mixture to the wet mixture and mix on low speed, then add the remaining flour mixture and mix until the batter comes together, then add Chocolate chips.

6.  On a baking sheet lined with parchment paper, drop spoonfuls of the cookie dough.
Bake for 7-9 minutes until puffy.  Do not over bake!  You want them to resemble a brownie texture.
Allow to cool for 10 minutes.
 
That is the original recipe that Ashley over at Simply Baking posted but I did make one change.... 
I added the new Hershey Drops... The cookies and creme ones...  
You know you've seen them in the store and resisted buying them knowing that you'd get the bag home and eat the whole thing (I only know this because I bought a bag  three bags of these to make this recipe and we ate the first two before I could make them). 
I have to give lots of credit to my hubby because he was the one who suggested that the Hershey Drops would be great in this recipe! 
To add them I just cut them into quarters so they were around the size of a chocolate chip and folded them in at the end with the other chips! 
 
 
Got some time? You should stop over and check out Simply Baking and have a look at her other recipes too she has lots of cupcakes (my obsession!) like this Strawberry Cupcake that may be making its way into my oven very soon! And she's a girl after my own heart with a recipe for Egg Salad too! Gotta Love it! 
 
Hope you like these cookies as much as we do... 
One word of warning they make a big batch and they get gobbled up quick! 

Monday, May 9, 2011

Make it Monday! Peanutbutter Chocolate Chip Cookies!

I was making cookies this weekend when I spotted a half of a bag of Peanut Butter chips left over from this recipe in the cupboard. and thought Hmmmm Chocolate chips and Peanut Butter chips in a Peanut Butter Cookie... 


So I pulled out my Chocolate Chip Cookie recipe and tweaked it to bring out a few more "NUTTY" flavors...

1/2 C Butter
1/4 C PB Butter
1/2 C Brown Sugar
1/2 C White Sugar
1 Large Egg
1 tsp Vanilla
1 tsp Baking Soda
1 1/2 C Flour
Peanut Butter and Chocolate Chips

Cream your butters together. Once completely creamed add your sugars, and cream till fluffy. Add egg and vanilla, mix until fully incorporated. Then add flour and baking soda. Add Peanut Butter and Chocolate Chips (I usually just add until I feel like there is enough... But about 3/4 C each should do.)

Spoon onto a prepared cookie sheet and bake at 350 for about 12-15 mins. 
ENJOY! 


These are so quick and yummy and have the hint of Peanut Butter in the cookie its self but they are knocked up a notch with the Peanut Butter chips!

Give them a try! You wont regret it!

Wednesday, April 20, 2011

Super Easy Easter Treats!

I hate giving generic store bought candy for Easter,  I really hate to give candy at all.
I know that kids are getting candy and chocolate from everyone for the holidays, Easter and all the others too... and I have never met a kid that didn't love rice crispy squares... 
So for Delaney and her friend for Easter I made these!

Rice crispy nests with Marshmallow eggs... 
First thing is first... make a batch of rice crispy squares as per the box instructions (microwave or stove-top method will both work great!) Then I just pressed the warm mix into my mini muffin tin and let them harden completely... when they were ready I melted chocolate chips and poured some into each and then stuck the marshmallows into the chocolate before it hardened...
Egg and Bunny Pops! 
For these I took the warm mix and pressed it into a cookie sheet, let cool for a while maybe 20 mins or so... then cut with shaped cookie cutters... let them harden completely on a flat surface and then insert a lollypop stick. To decorate melt chocolate chips and put into a zip top baggie and cut a small hole out of the corner and "pipe" as you would with icing! 

I bagged these up in Easter Bunny bags and tied them off with a twisty tie and they are ready for gifting...
What treats are you making for Easter?

Monday, April 11, 2011

Make it Monday!

I Love Cookies...
I Love Chocolate....
I Love Coffee....

But I LOVE Chocolate Chip Coffee Cookies!

These cookies are amazing I found a recipe for these type of cookies before but they were too dry and not exactly my cup of tea... or coffee if you will. So I kinda tweaked them and changed them and made my own...


1/4 cup granulated sugar
3/4 cup brown sugar
1/2 cup of margarine (softened)
1 egg
1 tbsp vanilla
1 1/2 cups flour
1 tbsp instant coffee granules 
1 tsp baking powder
2 cups chocolate chips or chocolate chunks 
(I like to cut up baking chocolate squares into small chunks)

Cream your butter and sugars then add the egg and vanilla, mix in your flour, baking powder and coffee granules. Mix in your Chocolate until evenly distributed. Scoop on to a lined baking sheet and bake for 8-9 mins at 350. These are a very chewy cookie, you can bake a bit more if you like but try not to let them go much longer or the bottoms will start to burn. 

mmmmm.... right out of the oven!

Once you have them all baked and have let them cool add this glaze to make them extra decedent and over the top!

Coffee cookie glaze!
1/2 tsp instant coffee granules
1 tbsp of HOT water
1/2 cup icing sugar
Dissolve the coffee in the hot water and add it to the icing sugar mixing until the icing sugar dissolves completely, and drizzle over the cooled cookies! (this is also great on regular chocolate chip muffins or on oatmeal muffins too)

 Perfect for a Nap Time snack.... 

Bake them up and give them a taste! I swear you will be hooked too!
Do you have any recipes that include my favorite ingredients? if you do please share in the comments I'd love to try them!


Tip Junkie handmade projects

Monday, April 4, 2011

Make it Monday!

Do you ever take the coupon/recipe cards that are in the isles at the supermarkets? I usually don't take them unless I know I will use them, and sometimes if I think maybe I might... Who am I kidding I take them all the time and end up throwing away more coupons than I ever use or if it's a recipe I end up never using it and it just gets filed away with maybe someday I will try this...

That was the case with these cookie bars up until a few weeks ago... when I figured hey I'll give it a good old college try... and THEY ARE A SUCCESS! 
Robyn is still working his old job(the new one hasn't started yet, but fingers crossed it will be soon!) so I sent some to work with him hoping to gauge how good these cookies are and they are defiantly a winner! Men don't lie about cookies... lol

So here they are Peanut Butter and Chocolate Oatmeal Cookie Bars! 


2 cups packed brown sugar
1 cup butter (softened)
1 egg
1 tbsp vanilla 
2 cups each Flour and quick cooking oats
1/2 tsp each baking powder and baking soda
1/4 tsp salt
1 1/4 cups peanut butter chips
3/4 cups semi sweet chocolate chips

Preheat oven to 350 degrees.
Cream butter and sugar, add egg and vanilla, mix well then add oats, flour, baking soda, baking powder and salt beat on low until well mixed (I used a wooden spoon when it got to hard to handle with my mixer....) then add your Pb butter chips and chocolate chips! 
Press dough into a rimmed cookie sheet (11x7) that is prepared with butter and flour (I line my cookie sheet with tin foil so it just flips right out) cool completely in pan then flip out on a large cutting board or your counter and and slice into bars. 
The recipe says that for a special occasion drizzle melted Pb butter chips and chocolate chips over the top of the bars before you cut them but I tried making them both ways and I much prefer them with the drizzle... without the drizzle just tastes like something is missing!

I hope you enjoy these yummy bars and maybe I've inspired you to pull out some of your "maybe someday" recipes.... If you have one you've tried recently or if you have one your not brave enough to try just yet... let me know in the comments and maybe I will try it for you...

Monday, March 21, 2011

Make it Monday!

I found a new blog to follow.... I know, I know as mentioned I have a problem with blogs...

This new one is right up my ally! The "Make Your Own" Zone is a wonderful blog where author Bev has compiled not only some of her favorite things to make but also lets you know if some of the things that you can make at home are worth your money or not... last week she posted this recipe for No Bake Chocolate Cookies so I thought I would give them a try! 

1 stick of butter (or margarine)
2 tablespoons cocoa powder
2 cups white sugar
1/2 cup milk
1/2 cup creamy peanut butter
1 teaspoon vanilla
3 cups quick cooking oats.

1.  Melt the butter in a saucepan over low heat.
2.  Add the cocoa powder, sugar, and milk and stir to combine.
3.  Continue to heat until mixture comes to a boil.  Boil for one minute longer, stirring constantly.  Then remove from heat.
4.  Stir in the peanut butter and vanilla.
5.  Finally, add the oats and mix well.
6.  Drop by spoonfuls onto waxed paper and let cool

There are so many bonuses to this recipe, they are so easy, you don't have to preheat your oven, they are practically gluten free, their made with PB butter so they are higher in protein and made with whole grain quick cooking oats,
they take only 7 ingredients (you likely have everything on hand to make them), they are yummy. Major draw back they are made with PB butter so they can't be brought to school with your kids and likely can't be brought to work for most people... 

but try them anyway because they are awesome! 

Visit Bev over at The "Make Your Own" Zone and check out her blog!

Monday, March 7, 2011

Make it Monday!

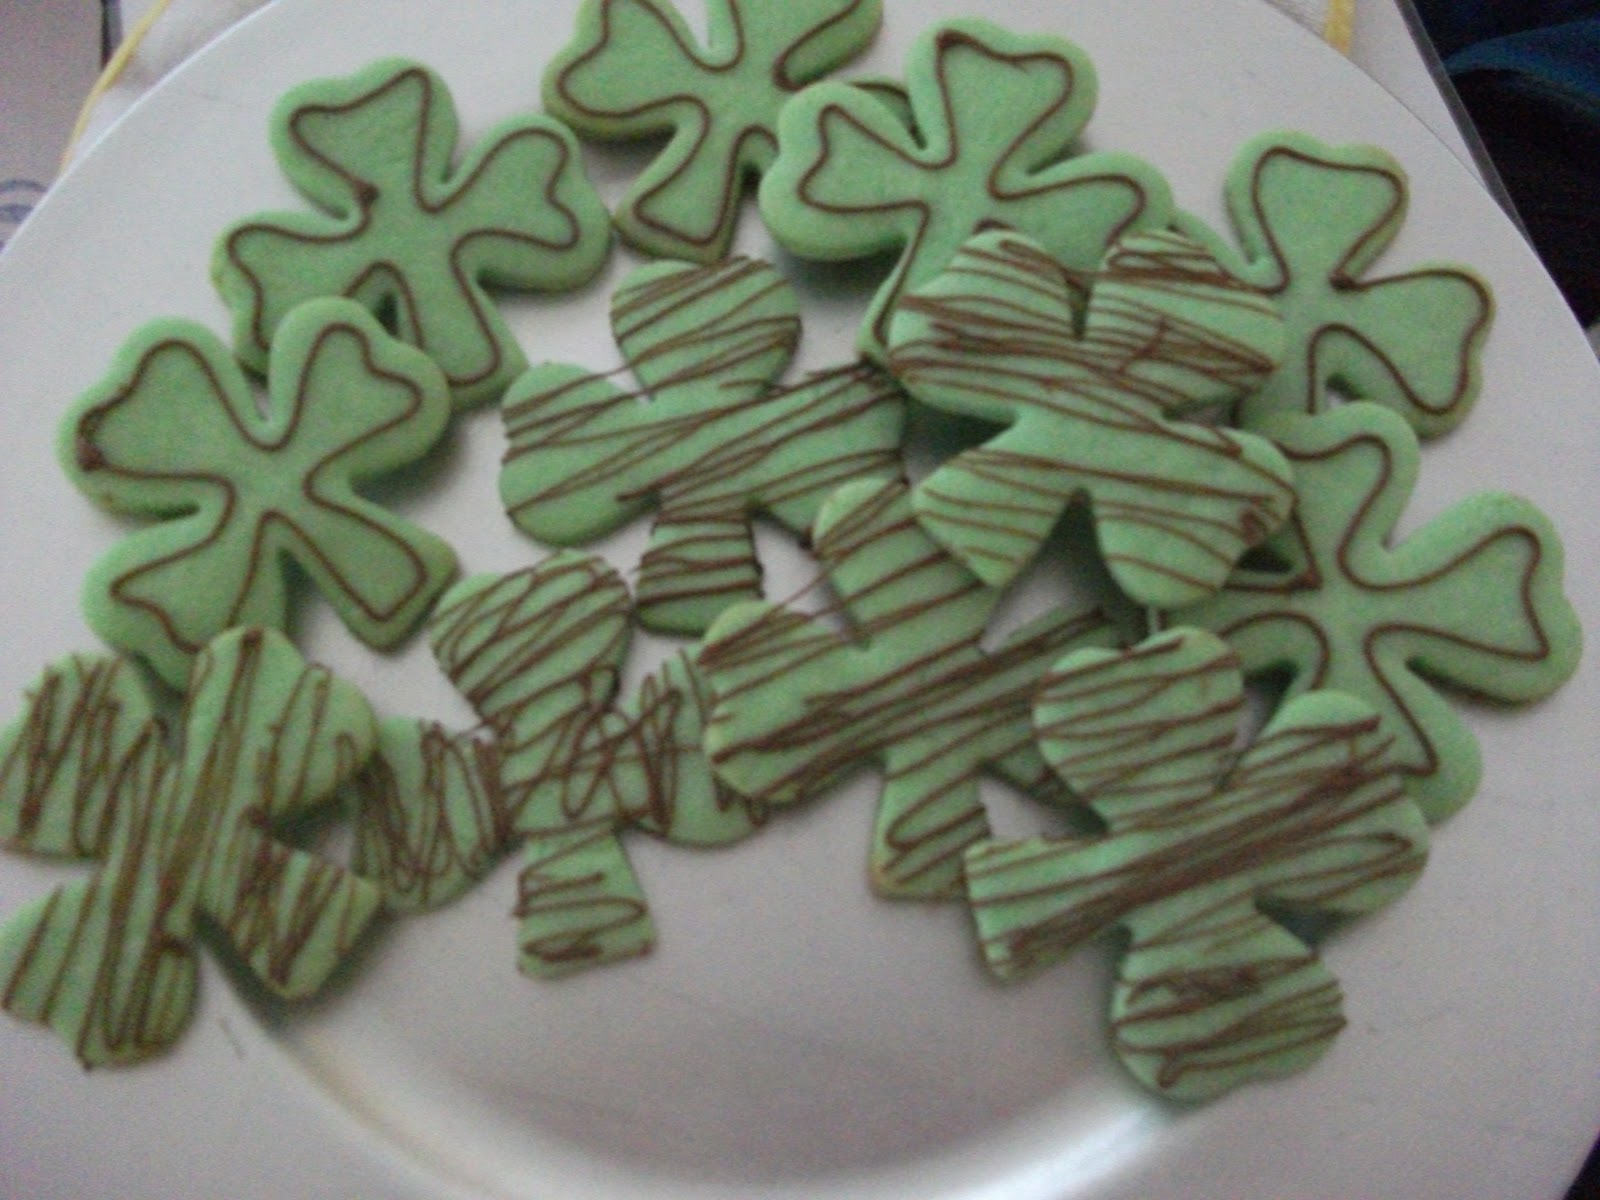
Today's Make it Monday treat... Green Shamrock Sugar Cookies 

I found this recipe in Better Homes and Gardens Christmas Cookie recipe book that was published a few years back and it has been my go to recipe for sugar cookies since then, I use it all year long! you can also find it here with directions to make Santa faces. Better Homes and Gardens

Ingredients

  • 1/3  cup  butter (no substitutes)
  • 1/3  cup  shortening
  • 3/4  cup  sugar
  • 1  teaspoon  baking powder
  •   Dash  salt
  • 1    egg
  • 1  teaspoon  vanilla
  • 2  cups  all-purpose flour

Directions

1. Beat butter and shortening in a large mixing bowl with an electric mixer on medium to high speed for 30 seconds. Add sugar, baking powder, and salt; beat till combined. Beat in egg, milk, and vanilla. Beat in as much of the flour you can with the mixer. Stir in remaining flour with a wooden spoon. Cover dough and refrigerate about 3 hours or till easy to handle.
2. Roll dough on a lightly floured surface till 1/8 inch thick. Cut as desired. Place shapes 1 inch apart on an ungreased cookie sheet.
3. Bake in a 375 degree F oven for 7 to 8 minutes or till the bottoms are lightly browned. Cool 1 minute on cookie sheet. Transfer cookies to wire racks and cool completely.


(please excuse my poor photography...)
To decorate I just melted down some chocolate chips and put the melted chips in a zip top baggie cut a small hole in the bag and decorated away, I usually just drizzle it over or outline as you can see in the picture above but you could always use the icing of  your choice, a friend of mine make cookie sandwiches out of her sugar cookies placing icing between two of the cookies! YUM!


I made a few alterations to the recipe to make them green, I added 1/2 the vanilla as I didn't want the food coloring to water down the recipe too much, and of course I used green food coloring to make them green. I used just regular food coloring but you could certainly use the gel colors you would use for coloring icing or fondant as it would change your texture and will give you a richer color. Also if you wanted a minty cookie you could use a mint extract rather than vanilla, or use mint flavor chocolate chips to decorate!

Hope you enjoy these YUMMY cookies as much as I do...
Do you have a recipe that you would like to share? If you stop by leave me a comment or a link to your favorite recipe!